2025年2月のリリース以来、Deep ResearchはChatGPTユーザーの間で広く利用されるようになった。私自身、6月ごろにLangGraphを使って独自に実装もしたが、その後の6月26日、OpenAIからDeep Research専用のモデル(o3-deep-research / o4-mini-deep-research)が公開された。このモデルを使えば、「検索 → 分析 → 執筆」という一連のリサーチフローを自動で実行するエージェントを、わずかなコードで構築できる。
Deep Research用モデルが参照できる検索対象は、次の3種類に分かれている。
Web検索を使えばChatGPTのDeep Researchと似た体験が得られるが、MCPサーバーを利用すれば、自社データや独自の知識ベースを対象にしたDeep Researchを構築できる。この記事では、そのようなMCPサーバーの作成手順と動作確認までを実例を交えて紹介する。
MCPサーバーの実装
実装に入る前に、Deep Researchモデルが要求するMCPサーバーの仕様を確認しておく。
このモデルで利用するMCPサーバーは、「search」と「fetch」の2つのインターフェースを備えている必要がある。関連する情報をざっくり調べる場合にはsearch、その中から詳細を知りたい文書がある場合はfetchを使うと考えればよい。
- search:クエリを受け取り、検索結果のリストを返す。
- fetch:検索結果のIDを受け取り、対応する文書の内容を返す。
searchの出力仕様
各検索結果は「ID」「タイトル」「URL」の3要素を持ち、results配列の下に格納される。一般的な検索APIと似た構造になっている。
| フィールド | 型 | 必須 | 説明 |
|---|---|---|---|
results |
配列 | ✔ | 検索結果の配列。各要素は以下のオブジェクト構造を持つ。 |
├ id |
文字列 | ✔ | ドキュメントまたは検索結果アイテムの一意なID。fetchで使用される。 |
├ title |
文字列 | ✔ | 人間が読めるタイトル。 |
├ url |
文字列 | ✔ | 引用用のURL。 |
fetchの出力仕様
fetchは、検索結果の詳細を返す役割を持つ。以下がそのフォーマットで、特に特別な点はない。
| フィールド | 型 | 必須 | 説明 |
|---|---|---|---|
id |
文字列 | ✔ | ドキュメントまたは検索結果アイテムの一意なID。 |
title |
文字列 | ✔ | ドキュメントやアイテムのタイトル。 |
text |
文字列 | ✔ | ドキュメントやアイテムの全文。 |
url |
文字列 | ✔ | ドキュメントのURL(引用・出典に使用)。 |
metadata |
オブジェクト | 任意 | ドキュメントに関する補足情報(キー/値のペア)。 |
実装
searchとfetchの仕様について理解したところで、MCPサーバーを実装していく。今回は、MCPサーバーの実装にFastMCPを、検索データベースにChroma DBを使用する。埋め込みモデルには軽量で日本語にも対応したRuri v3を採用した。Ruri v3は検索クエリと検索対象文書で埋め込み時のプレフィックスが異なる点に注意が必要だ。
from typing import Any

import chromadb
from chromadb import Documents, EmbeddingFunction, Embeddings
from fastmcp import FastMCP
from sentence_transformers import SentenceTransformer


class Ruriv3EmbeddingFunction(EmbeddingFunction):
    def __init__(
        self, model_name: str = "cl-nagoya/ruri-v3-30m", device: str = "cpu"
    ) -> None:
        self.model = SentenceTransformer(model_name, device=device)

    def __call__(self, input: Documents) -> Embeddings:
        docs = []
        for doc in input:
            if doc.startswith("検索クエリ: "):
                docs.append(doc)
            else:
                docs.append(f"検索文書: {doc}")
        return self.model.encode(docs).tolist()


server_instructions = """
This MCP server provides search and document retrieval capabilities
for chat and deep research connectors. Use the search tool to find relevant documents
based on keywords, then use the fetch tool to retrieve complete
document content with citations.
"""

# Create an MCP server
mcp = FastMCP("Demo", instructions=server_instructions)
client = chromadb.PersistentClient()
collection = client.get_collection(
    name="deep-research",
    embedding_function=Ruriv3EmbeddingFunction(),
)


@mcp.tool()
async def search(query: str) -> dict[str, list[dict[str, Any]]]:
    """Search for documents using vector store search.

    This tool searches through the vector store to find semantically relevant matches.
    Returns a list of search results with basic information. Use the fetch tool to get
    complete document content.

    Args:
        query: Search query string. Natural language queries work best for semantic search.

    Returns:
        Dictionary with 'results' key containing list of matching documents.
        Each result includes id, title, text snippet, and optional URL.
    """
    if not query or not query.strip():
        return {"results": []}

    items = collection.query(
        query_texts=[f"検索クエリ: {query}"],
        n_results=5,
    )
    results = []
    for id, text, metadatas in zip(
        items["ids"][0], items["documents"][0], items["metadatas"][0]
    ):
        result = {
            "id": id,
            "title": metadatas.get("chapter_name", "filename"),
            "text": text,
            "url": "https://www.oreilly.co.jp/books/9784814401154/",
        }
        results.append(result)

    return {"results": results}


@mcp.tool()
async def fetch(id: str) -> dict[str, Any]:
    """Retrieve complete document content by ID for detailed analysis and citation.

    This tool fetches the full document
    content from vector store. Use this after finding
    relevant documents with the search tool to get complete
    information for analysis and proper citation.

    Args:
        id: Local document ID

    Returns:
        Complete document with id, title, full text content,
        optional URL, and metadata
    """
    item = collection.get(ids=[id])
    result = {
        "id": id,
        "title": item["metadatas"][0].get("chapter_name", "filename"),
        "text": item["documents"][0],
        "url": "https://www.oreilly.co.jp/books/9784814401154/",
        "metadata": None,
    }

    return result


if __name__ == "__main__":
    mcp.run(transport="sse", host="0.0.0.0", port=8000)
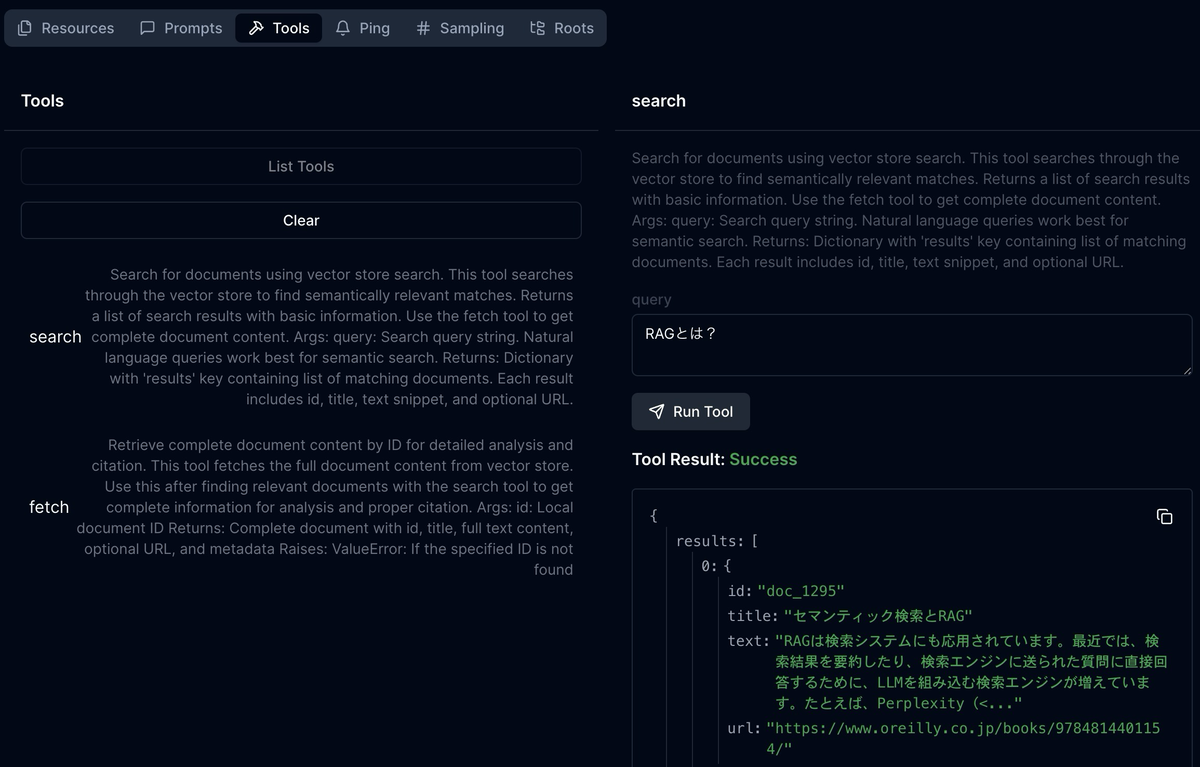
MCP Inspectorを起動して、ツールを確認してみよう。
fastmcp dev server.py
UI上からはツールとしてsearchとfetchがあることを確認できる。試しに、searchツールに対して「RAGとは?」というクエリを送ると、関連する検索結果が帰っていることを確認できた。
Deep Researchのテスト
MCPサーバーが動作することを確認したら、Deep Researchモデルから実際に利用してみる。ローカルのMCPサーバーには直接アクセスできないため、ngrokを使って公開URLを取得する。
ngrok http http://localhost:8000
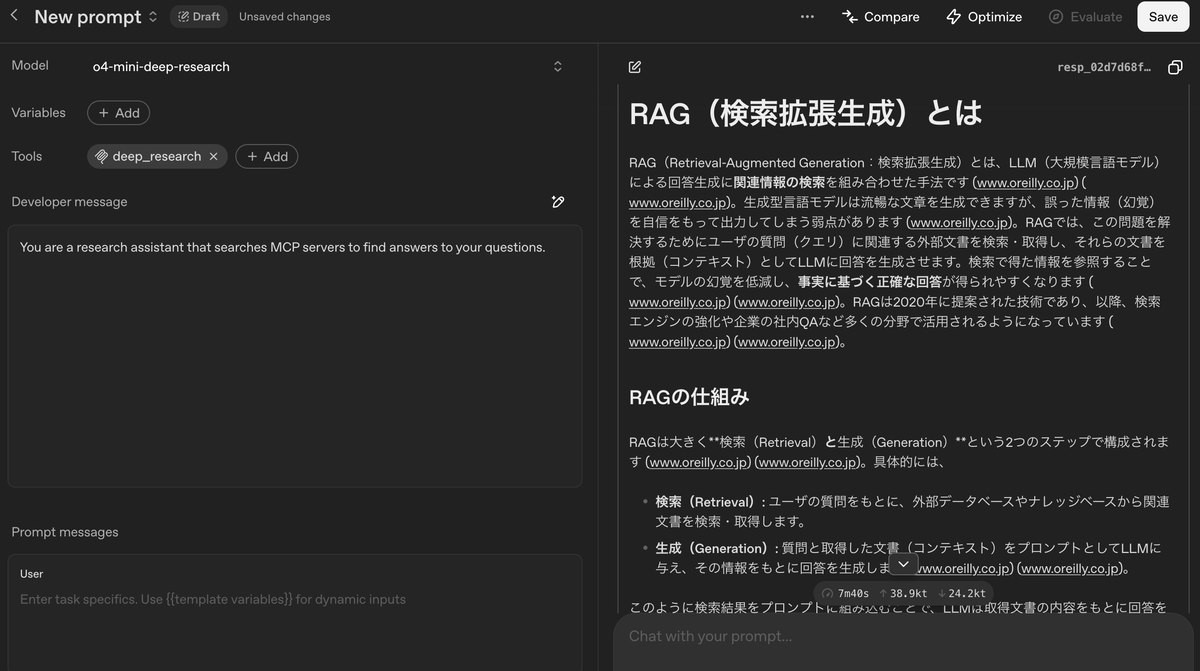
Responses APIからでも動作は確認できるが、今回はプロンプトダッシュボードを利用して、Deep Research用モデルとMCPサーバーの連携を確認する。新規プロンプトを作成し、プロンプト設定で新しいMCPツールを追加する。ツールを追加する際には、承認不要の設定(Never)を選択する必要がある点に注意する。

ツールを追加できたら、開発者メッセージとクエリを入力して実行する。今回は「RAGについて教えて」というクエリを入力している。実行するとsearchとfetchを繰り返し呼び出し、数分で以下のようなレポートが完成する。
ちなみに、Responses APIを使う場合は以下のようにする。
from openai import OpenAI

client = OpenAI()

instructions = "<deep research instructions...>"

resp = client.responses.create(
    model="o4-mini-deep-research",
    background=True,
    reasoning={
        "summary": "auto",
    },
    tools=[
        {
            "type": "mcp",
            "server_label": "deep_research",
            "server_url": "https://mycompany.com/mcp",
            "require_approval": "never",
        },
    ],
    instructions=instructions,
    input="RAGについて教えて",
)
まとめ
本記事では、MCPサーバーを用いることで、Deep Researchを独自データに拡張できることを確認した。OpenAIのWeb検索を使う場合と比べると、MCPサーバーを構築する分だけコード量が増えるが、それでもこの程度のコードで、Deep Researchを実現できることは非常に大きい。実践的には、ユーザー意図の明確化やプロンプトの書き換えといったこともする必要があるが、それらについては参考資料を参照してもらいたい。